Table of contents
Updated - May 7, 2025
The MB Sprinter as a self-sufficient extension - a justified wish for motorhome owners. Self-sufficient means being independent of shore power everywhere.
The request can be granted, but you should keep an eye on the permissible gross weight of the 3.5 t vehicle, especially in the 319 class.
Battery and charging technology
As in this Contribution described in detail, a power pack of 4 x 280 Ah LiFePo4 batteries, including all peripherals, can be realized in a very compact design.
The package - without cabling and PV superstructure - already weighs 178.7 kg and is designed so that the PV modules charge the batteries via the MPPT controller, the inverter charges the vehicle battery, another charges the four batteries via shore power, and a charging booster charges them in addition to the PV, or when driving in the dark.
However, the same setup with AGM batteries would require a further 222 kg of weight. LiFePo4 batteries are therefore definitely the better choice, not to mention their far more advantageous electrical properties.
Parts list (data sheets)
- 4x 280 Ah EVE - 12 V 1,120 Ah corresponding to 14,784 Wh (LiFePo4 surface-mounted battery) - data sheet
Weight with housing 96 kg - 1x XENES Smart BMS 400 A TS1 - 12 V 400 A - Instructions and data sheet
Weight - 2x Jinko Solar - Tiger Neo N-Type Bi-Facial Full Black each 575 ... 600 W PV modules - data sheet
Weight 31 kg each - 1x Victron SmartSolar 250/100 VE.Can - MPPT controller 12 V 1,450 W - data sheet
Weight 4.5 kg - 1x Victron Orion-Tr Smart 12/12 30 - Charging booster 12 V / 12 V 30 A - data sheet
Weight 1.8 kg - 1x Victron Blue Smart IP22 12 V 15 A charger 230 V (starter battery) - data sheet
Weight 1.3 kg - 1x Victron Blue Smart IP22 12 V 30 A charger 230 V (surface-mounted battery) - data sheet
Weight 1.3 kg - 1x Victron Phoenix Inverter 1200 (1,000 W / 2,400 Wp) - data sheet
Weight 7.7 kg - 1x Victron Shunt VE.Can 1000 (current measurement) - data sheet
Weight 1.4 kg - 1x Victron Lynx 1000 Distributor (voltage distribution incl. fuse protection 4 strings) - data sheet
Weight 2.2 kg - 1x Victron Cerbo GX Touch 70 (system monitoring) - data sheet
Weight 0.5 kg
Connected consumers
Permanently connected loads are:
- Victron Phoenix Inverter 1200 (Inverter - 1,000 W / 2,400 Wp)
- VEVOR - 50 ltr. compressor freezer box (12 V - average consumption 175 Wh/d)
- Victron Blue Smart IP22 12 V 15 A - Starter battery charger
- 2x DCDC converter 12 V 3 V
- DCDC converter 12 V 5 V
- DCDC converter USB 12 V 5 V
- 5x USB ports (1x fast charging port)
- DCDC converter 12 V 48 V (POE)
- 2x Homematic differential temperature sensor (DCDC converter 3 V)
- Raspberry Pi 4B (5 V 15 W)
- 2x switching actuator 4-fold (12 V) (light)
- 1x Homematic switching actuator 230 V 1-channel (ventilation)
- 1x tube fan 230 V 7.5 W - Ventilation 100 cm3/h
- 5x LED cargo area (4x 55 W) and cab lighting (6 W)
- 1x HIKVISION camera (reversing camera - 12 W)
- 1x LED digital clock (cab)
Reasons for the choice of components
It is striking that only three manufacturers are used for the battery technology: EVE, Victron and XENES.
- EVE supplies Grade A batteries with a guaranteed number of cycles of 6,000 at 80 percent discharge (25 °C)
- VICTRON, founded in the Netherlands in 1975, is represented in over 60 countries with around 1,000 different products and has a worldwide service network
- XENES, founded in Belgium in 2008, German-speaking, very accessible and efficient service
The Raspberry Pi is responsible for controlling the ventilation and lighting.
Assembly of the PV modules
The Sprinter roof structure has prefabricated holes in the right and left outer roof grooves, which are sealed with painted plastic plugs. These are used to fasten the profile rails, which form the basis for the PV module structure, using carriage bolts or special profile screws of a suitable length.
Rubber seals and body washers should be used to dampen vibrations. The assembly sequence is then as follows: Place the rubber seal on the hole suitable for the screws, then place a body washer on top. This applies to all holes.
The screws are then inserted into the groove of the mounting profiles and placed on the roof together with the profile so that they are congruent with the drill holes, fine-tuned and then slowly tilted towards the drill holes, corrected again if necessary and then lowered fully into the drill holes until they rest on the body panels.
A rubber seal is now screwed on from the inside, followed by the body washer and self-locking nut, and tightened with feeling. The rubber seal should not deform in the process!
Using purchased or self-made aluminum brackets, the transverse and subsequent longitudinal profiles are screwed on, to which the PV modules are attached using the brackets provided. All nuts should be fitted with a toothed flange.
If roof hatches are installed under the PV modules, the distance from the rear of the module must be dimensioned so that the roof hatches can be fully opened. This may well be a distance greater than 10 cm. The mounting profiles used must be dimensioned accordingly. The longitudinal profiles should be as high as possible and the crossbars as low as possible in order to keep wind resistance as low as possible. The longitudinal profiles mounted on them accommodate the mounting brackets of the PV modules.
The crossbars must not be attached above the roof hatches, but only in front of or behind them to ensure unhindered opening and closing of the hatches.

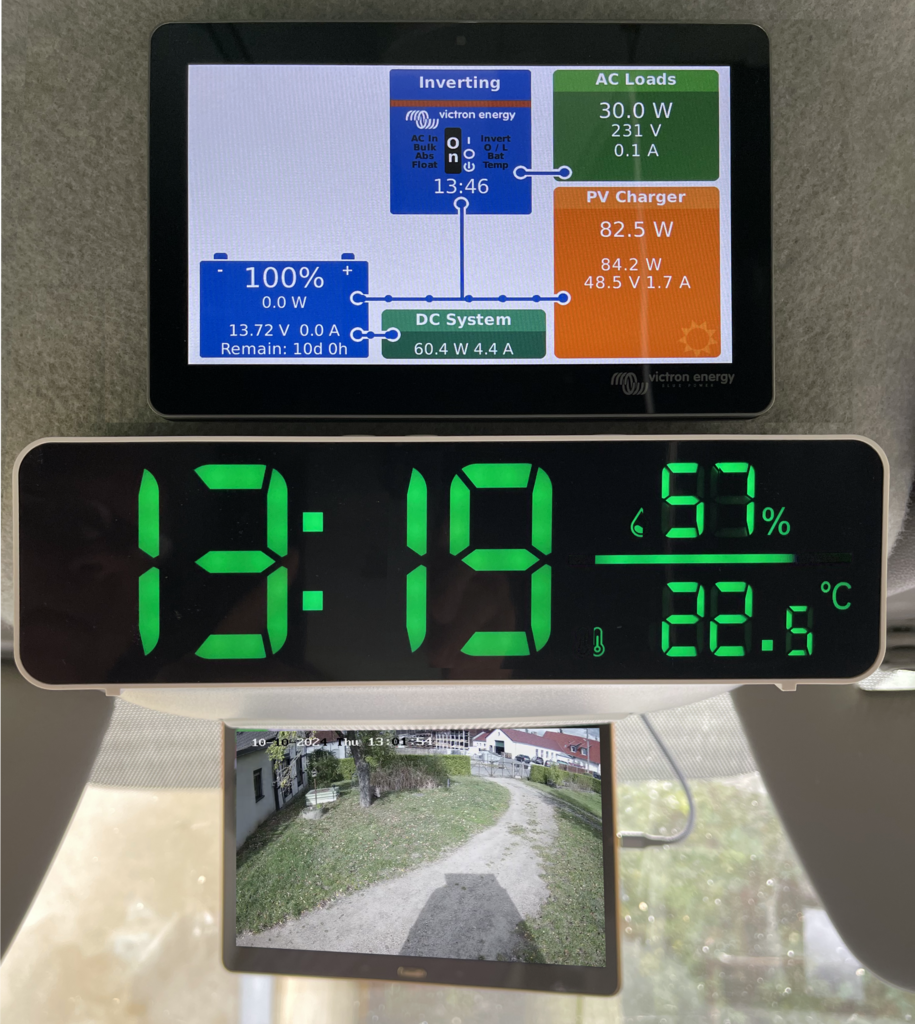
Cerbo GX display arrangement
The Victron Cerbo GX Touch 70 display found its place here above the small storage compartment above the rear-view mirror (including a digital clock, NTP via router) and attached to the rear-view mirror, a tablet for navigation and as a monitor for the reversing camera.
Conclusion
Previous "worst case" was a 6 percent discharge of the LiFePo4 batteries to 94 %, which were usually balanced out again in the course of the morning (without charging boosters / driving), purely through PV energy.
In this respect, 100 percent self-sufficiency can be assumed.