Table of contents
Updated – April 24, 2024
AIO Creator Neo is software from Mediola that can be used to visualize all devices and system variables contained in RaspberryMatic or HomeMatic for mobile devices.
The Company EASY SmartHome GmbH offers a free one-month trial access and then a paid cloud service that offers secure communication between the headquarters and its server via a VPN connection, as well as the connection of the AIO Creator Neo account.
Setup – CloudMatic Access
Setting up trial and paid CloudMatic access is done via the RaspberryMatic user interface Settings – Control Panel – Cloudmatic.
After receiving an email with the access data, you can use it in the AIO Creator Neo software Device Manager under Gateways by clicking on New Gateway the existing headquarters, its name and data entered.
In the lower section CloudMatic must be entered: the ID, the User name and that manually assigned in the CloudMatic Dashboard via Edit Data password for access to cloudmatic.de and remote access to the headquarters.
Under the rider Devices can be clicked on Import Devices The control center devices, but also their system variables and programs are imported.
AIO Creator Neo
Create activation button
On the AIO Creator Neo interface you can use the menu selection using Remotely – New a new remote control can be created. In the input mask that appears, the parameters are compared depending on the target device used (tablet, telephone, etc.) or adopted according to the preselection.
In the empty template you first have to create a button to which you assign exactly this action:
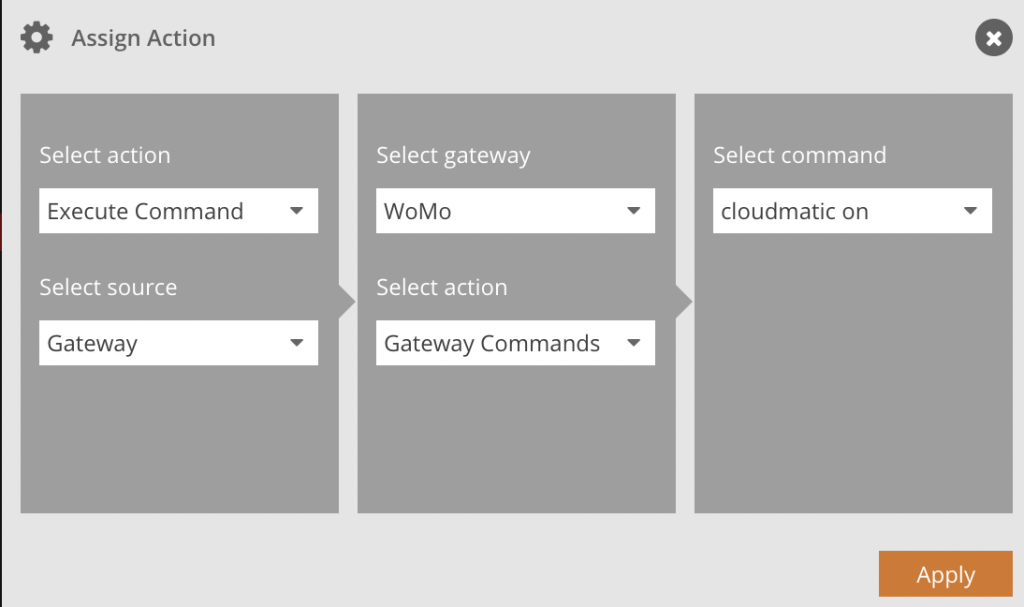
About the menu Remote upload The interface is uploaded to the server and downloaded on the device after downloading the app and logging into the (test) account. Outside your own WLAN, i.e. via the mobile network, this activation button is now clicked. This activates bidirectional data transmission with your own headquarters via the Mediola server.
Creating symbols, text fields, etc.
Now any device data or values of system variables can be positioned on the surface using symbols (including self-created ones that must be imported before use). To do this, a status is assigned to a text field or symbol:
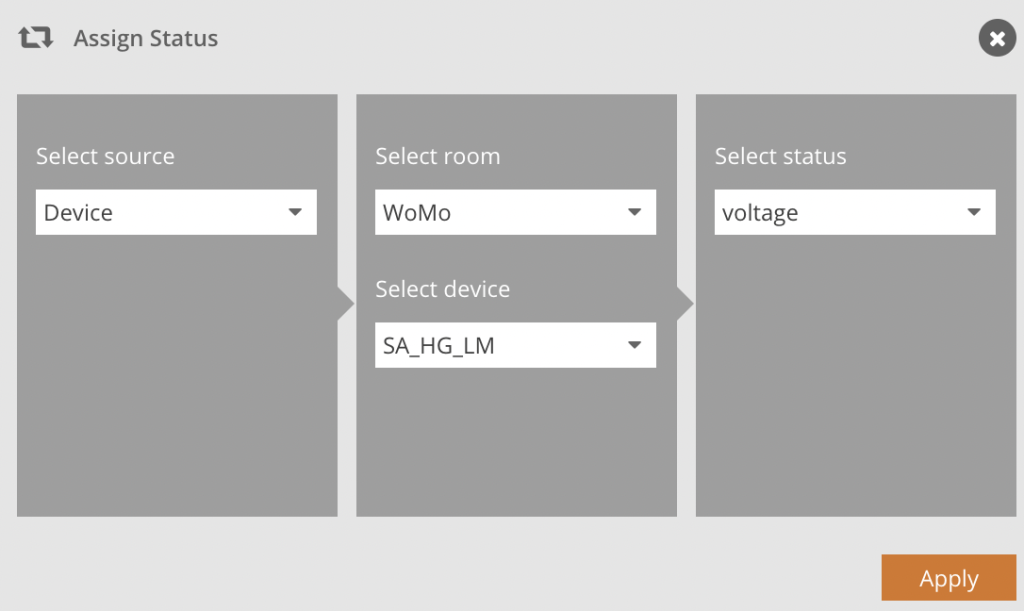
The properties of the symbol / text field are individualized via this panel:

For example, the voltage display of a Homematic power measuring device was defined here:

The imitated LCD display was created with a button of appropriate coloring, over which all the desired displays were ultimately placed.
Define rules
In order to display a status change, a rule must be defined which, for example, specifies that a device that is switched ON is displayed with a red square and a device that is switched OFF with a gray square. This means that each state is linked to the desired PNG image, saved under a unique name (here ONOFF) and ultimately assigned:
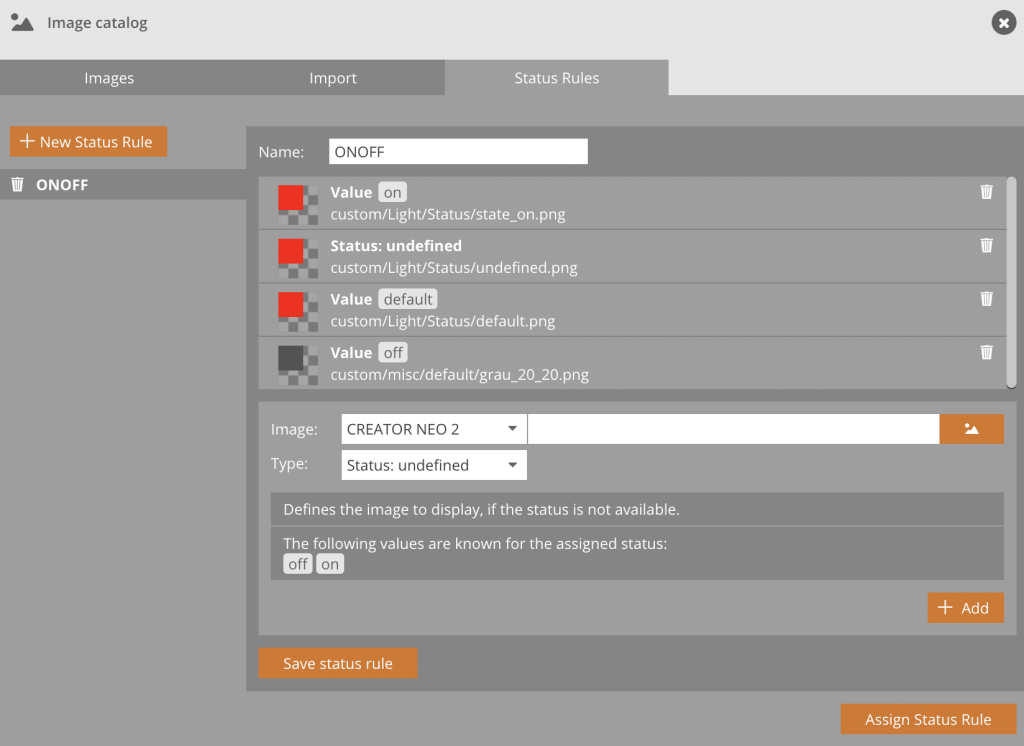
The elongated buttons (I / 0) represent buttons that are used to implement actions such as switching on or off.
Measured values come from, for example, temperature sensors, wall thermostats or the power measuring device mentioned.
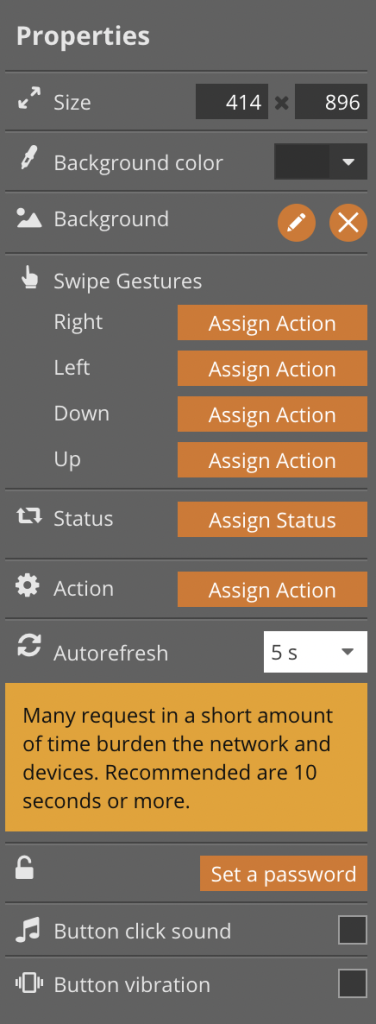
To ensure that the values are updated at regular intervals, this parameter can be changed by clicking on the template background under Autorefresh must be entered (here 5 seconds):
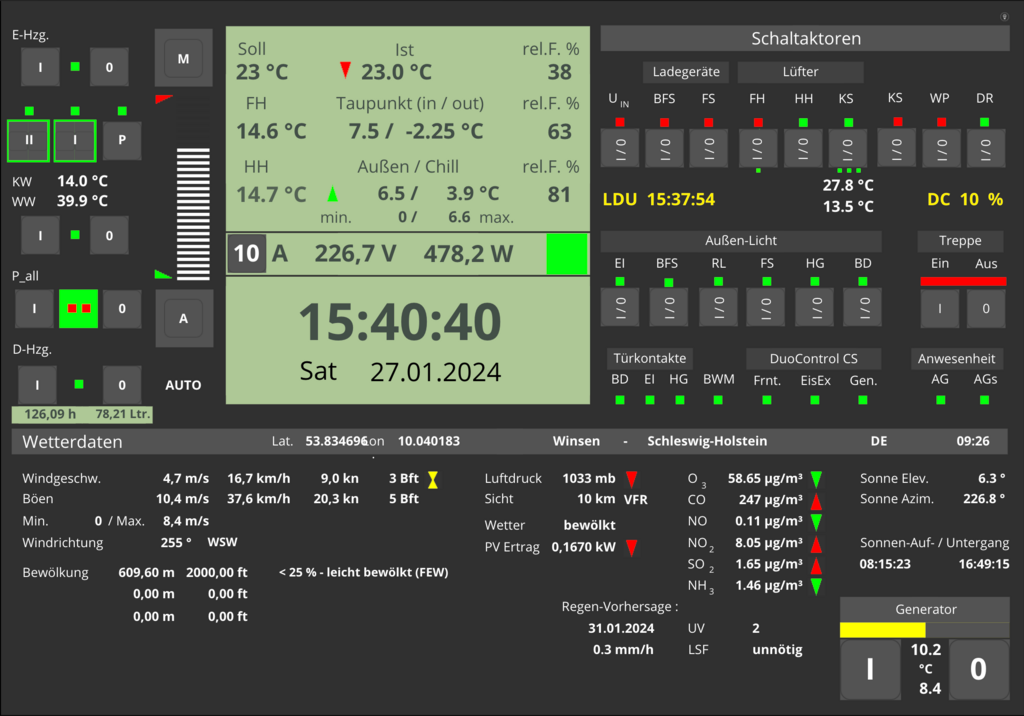
Template – Live View
In the live view, the template including the transferred data appears like this:
The button with the small light bulb in the upper right corner represents the activation button mentioned at the beginning, which can be deleted after successful activation.
The vertical slider to the left of the LCD display is used to manually set the temperature of the wall thermostat. Using the buttons above and below M and A The mode of the wall thermostat can be switched from manual to automatic. In manual mode, the set temperature is displayed as a target value. The currently prevailing mode is shown at the bottom of the screen AUTOMOBILE, or. MAN reproduced.
To the right of this are the time of the last data update (LDU – Last Data Update) and the DutyCycle (CD) is displayed. This makes it clear whether the update intervals are regular or whether data transmission has been suspended.
The clock and date display was placed above a correspondingly colored and resized button. She is in AIO Creator available via the side menu on the left, there as a clock symbol. Formatting can be done in the associated menu:

For the seconds display must be Autorefresh can be set to 1 second (set by default).
The day of the week is determined using a RaspberryMatic script that is called once a day at midnight and requires the system variable “WT”, defined as a string, to store the abbreviated day of the week:
var sWT = system.Date("%a").ToString();
dom.GetObject("WT").State(sWT);
The red squares (each created as 20 x 20 px PNG) are status messages from active switching actuators, inactive ones are shown in green.
The display at the bottom right shows the status of the generator, the choke and operation, as well as the temperatures of the intake air and the air blown out by the fan during operation. If there is a risk of overheating, the control automatically switches off the generator.
To the left of it, the average PV power expected on the following day, corresponding to the installed power as a basis for calculation, is displayed with a trend.
The status of the DuoControl regarding the gas supply to the generator, as well as the heating, etc. is also displayed for each pair of bottles. This provides the same functionality as the DuoControl display, but without installing two panels.
Weather data is obtained and displayed according to the GPS data of the respective location.
For example, sun position data, such as elevation and azimuth, sunrise and sunset times, UV index and resulting sun protection factor recommendation.
Air pollutants such as ozone, CO, NO, NO2, SO2 and NH3, including trends, are also displayed.
For (drone) pilots, in addition to wind speed and direction, there are also visibility, flight rules, and cloud layering with the corresponding altitude information. This data does not refer to the current position, but to the nearest airport.
ps If you need personal support in the implementation for a fee, you are welcome to Ticketing make!