Table of contents
Updated – January 20, 2023
You can buy a frame for a grill grate - or make one yourself.
We have the Solo Stove® ranger added. Small, compact and suitable for up to four people for warming and, of course, cooking or grilling. Since the Solo Stove® produces a flame that is around 200 °C hotter due to the special use and routing of the exhaust gas, only a very small amount of ash remains.
Solo Stove® offers a corresponding attachment on which you can place a cast iron grill plate. However, the price was a bit too high for us, which is why we decided on the do-it-yourself option.
We have this as a grill grate made of V2A 40cm diameter chosen.
After a lot of searching, among the tens of thousands of screws available, I was able to find just the necessary ingredients, except for the wing nuts, where only normal nuts were found. Wing nuts have the advantage that they can be handled without tools.
Material list:
- 6x cap nut M12 V2A
- 3x self-locking nuts M12 V2A
- 3x 50 cm threaded rod M12 V2A
- 3x hexagon screw M6 x 30 V2A
- 6x washer M6 V2A
- 3x M6 wing nut V2A
- 3x snap ring M6 V2A
- 3x 40 x 40 x 4 aluminum L-profile sections
Tool list:
- Cordless screwdriver with chuck up to 12 mm
- Ring wrench
- Chop saw or man. hacksaw
- Belt sander 150 grit or iron file
Get to work
Use the chop saw to cut the threaded rods to 50 cm (suitable for Ranger). Then cleanly deburr with the belt sander.
Screw self-locking nut onto one end. Clamp the threaded rod in the drill chuck of the cordless screwdriver. Grab the self-locking nut with a suitable wrench and screw it on at the appropriate speed of the cordless screwdriver until about 2 cm before the end of the threaded rod.
Screw a cap nut onto the opposite end and tighten it. When used, this is used to compensate for uneven floors in the range of up to around 15 mm.
Use the chop saw to cut three 35 mm wide angle pieces. Use the belt sander to break the edges, smooth the cut edges and round off the sharp corners. Refinish the edges by hand.
Attach grit for the holes to the angles, each 17.5 mm from the edge, i.e. in the middle of the width.
Equip one side of each angle with a 12.5 mm hole and the other with a 6.5 mm hole.
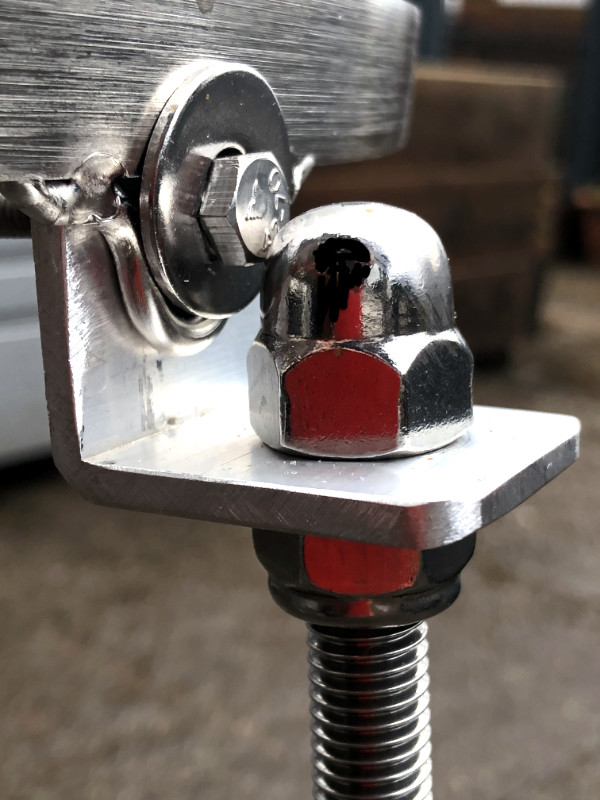
An L-profile section is placed on each of the threaded rods above the self-locking nut: the vertical side with the M6 thread pointing upwards. An M12 cap nut secures the angle.
There is an M6 washer on each M6 hex screw. Each of the screws prepared in this way is passed through one of the three hanging brackets on the grill grate, a washer is pushed on again and secured with an M6 nut.
Another M6 nut is screwed onto the M6 screw about 10 mm wide. Place an M6 washer on top, the L-angle with the 6.5 mm hole, followed by the snap ring, fixed with a wing nut.

Practical use
Supply Solo Stove® with firewood and light it. Place the grill rack stand over the Solo Stove®. One cast iron grill plate protects the cooking pot from soot and also allows food to be grilled at the same time.
After the wood has burned well, the pot can be put on and filled with food.
Re-fire as needed, but moderately, as the fire burns hotter than in a fire bowl.
