Table of contents
The grinder of the DeLonghi ECAM23.420 Although fully automatic coffee machines are protected against foreign bodies, impurities occasionally find their way into the packaging when the coffee beans are filled and from there into the grinder of the coffee machine.
Fortunately DeLonghi has taken a clever approach to the design, in that the grinder simply reacts resiliently in the event of a blockage and is not damaged.
But how do you get the foreign body out of the grinder? This is described below.
Dismantling the housing
To keep laymen's hands away from the inside of the machine, the DeLonghi the rear panel of the housing with five special screws, so-called Torx with inner pin:

A suitable tool for this is, for example, the BAHCO BE 7920.
Back wall
The first step is to loosen these five screws, two at the bottom to the right and left of the power cable and the right corner, and two slightly above the middle height on the right and left sides.
The rear panel can be lifted off the bottom of the housing and removed downwards by lifting it slightly at the bottom rear edge of the machine.
Side covers
Pull the two side panels about two centimetres towards the rear, allowing the retaining lugs to slide out of their anchorage. The respective side panel can now be lifted off the machine chassis in the same way.
Dismantling the front controls
The switch lever for milk frother / hot water can be removed with a strong pull. The swivel outlet is secured on the inside with a plastic seal. This is pulled out carefully, always parallel to the current position, i.e. do not tilt or tilt.
Top cover
The upper housing shell, which covers the grinder, is fastened at the back at the top with a Phillips screw on the right and left, as well as at the front on the side.
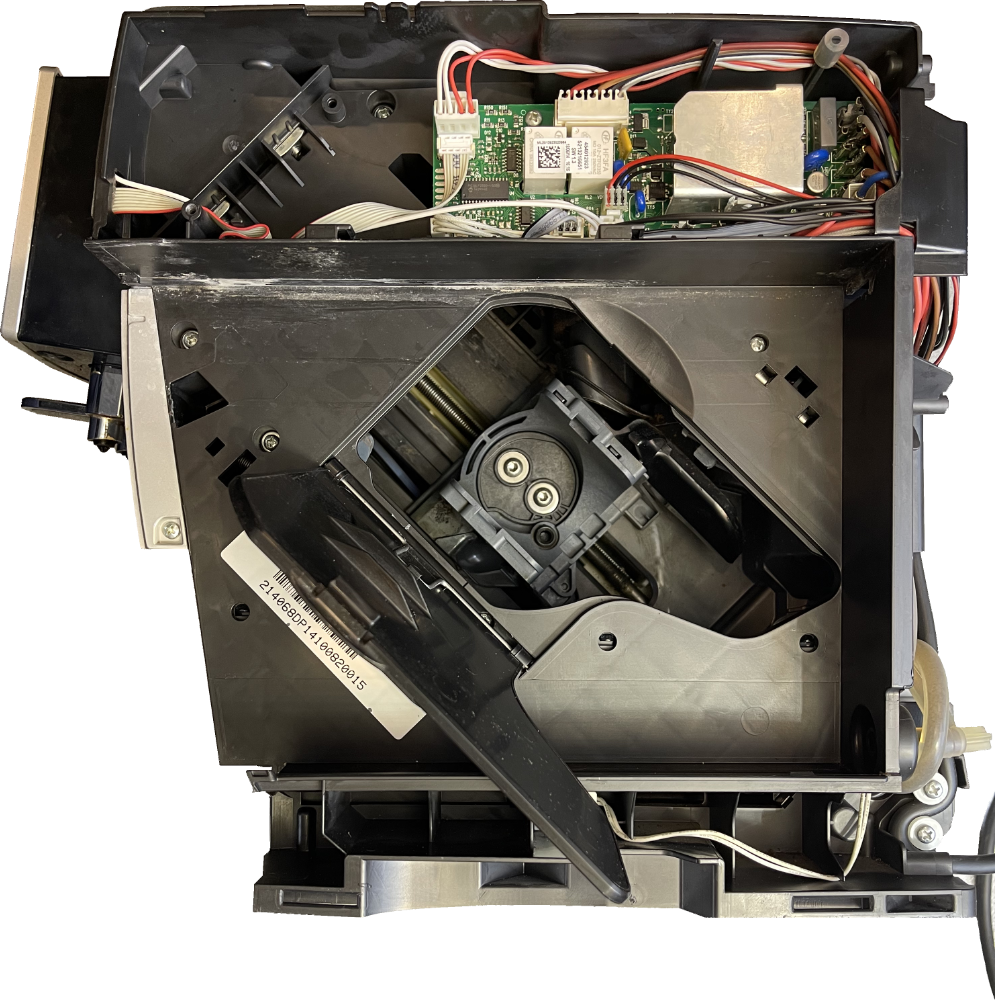
Grinder
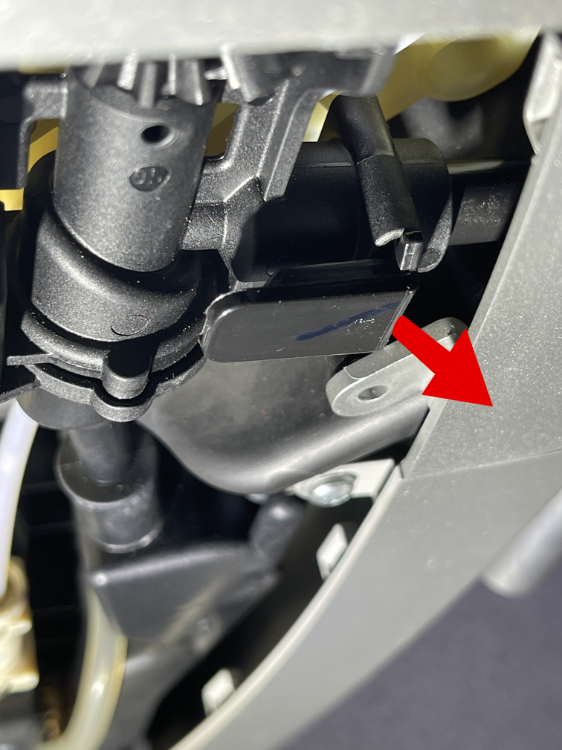
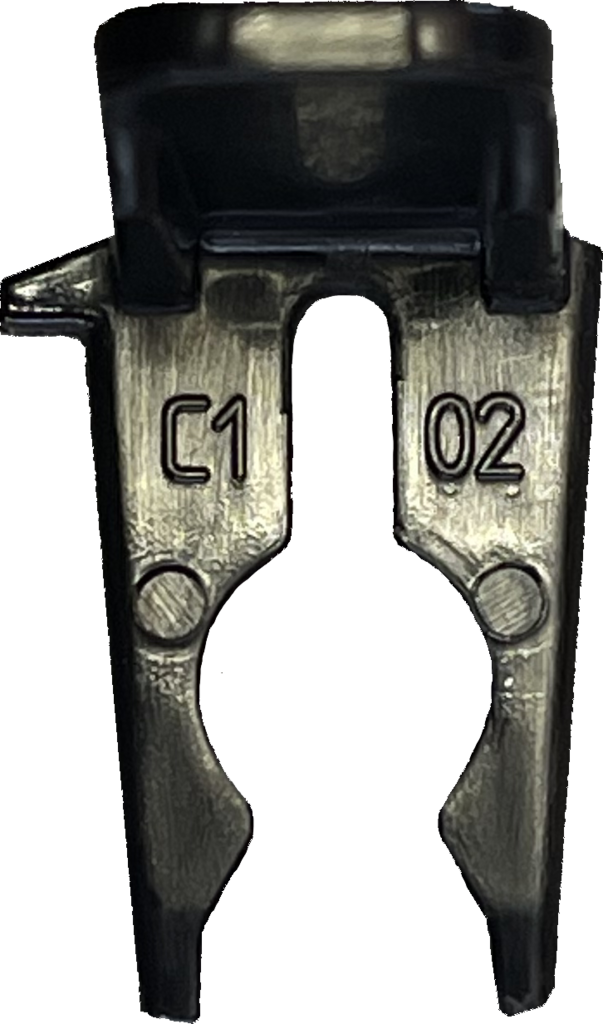
After removing the retaining clip, the milk frother / hot water outlet can be pulled out. The top cover can now be pulled vertically upwards and the grinder is freely accessible.

After fitting a Torx screwdriver, the painting can be moved manually. As this is a screw with a right-hand thread, first turn it to the left. If the grinder jams, turn it to the left, but if possible without loosening the screw. If the blocking foreign body is not released, the screw must be loosened completely and the grinding cone removed in order to remove the foreign body and clean the grinder.
Test
A function test should be carried out before assembly. To do this, the pomace insert with drip tray and the water tank must be inserted and the machine must be connected to the mains and switched on using the rear mains switch.
Don't forget to place a container under the spout to collect the rinsing water after switching on!
After rinsing, press the top right button on the control panel to start the grinding process. The grinding cone should rotate constantly as usual.
Cleaning
As the saying goes - assembly is carried out in reverse order ...
The machine can be cleaned on all sides, including the brewing unit, which is accessible via a flap to the left of the water tank and can be removed by pressing the two red latches together.
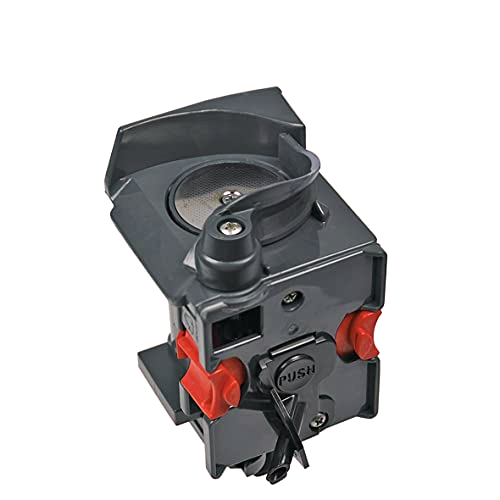
After removing the brewing unit, the areas behind it are also accessible for cleaning.
Assembly
First, place the upper section vertically on the machine and fix it in place with the four Phillips screws, one on the left and one on the right at the front, and two screws at the top rear.
The selector lever is then inserted into the upper opening at the front and pressed in firmly, followed by the milk frother / hot water outlet, which is finally secured against slipping out again with the clip shown above.
Now the two side panels are guided under the edge of the top cover from below at an angle, with a two centimeter gap at the front, fitted in at the bottom and finally pushed against the front by two centimeters so that the latches engage and the side panels sit flush.
Finally, the rear panel is mounted in the same way. At the top, the two Torx screws on the right and left, at the bottom the two screws on the left and right of the power cable and the last screw on the bottom right are inserted and screwed in place.